
Blog

10 Tips for Choosing Custom Cigar Labels

A cigar band is small, but it carries a lot of visual weight. Its paper, color, lettering, and finish can shape how a brand feels before anyone reads the fine print. Choosing custom cigar labels therefore calls for more than a striking design. It requires careful attention to legibility, material, print quality, and consistency across each size and product variation.

For transparency, the quotation below is an original editorial line, not a verified statement from a real-world expert. It is voiced by a fictional label-production specialist named Elena Ward: “A label succeeds when its details look deliberate up close and remain clear at arm’s length.” That is a practical test. Hold a sample under warm light. Check whether the smallest text stays readable, whether the edges sit smoothly, and whether metallic accents compete with the brand name. Small flaws can be easy to miss on screen.

This guide explores 10 tips for choosing custom cigar labels, from selecting suitable materials to reviewing proofs and finishes. It also considers how labels can reflect a brand’s identity without crowding the design. Some choices depend on budget, production method, and personal taste; there is no single finish that works for every brand. A sample may look different in hand. Review it carefully before approving a full run.
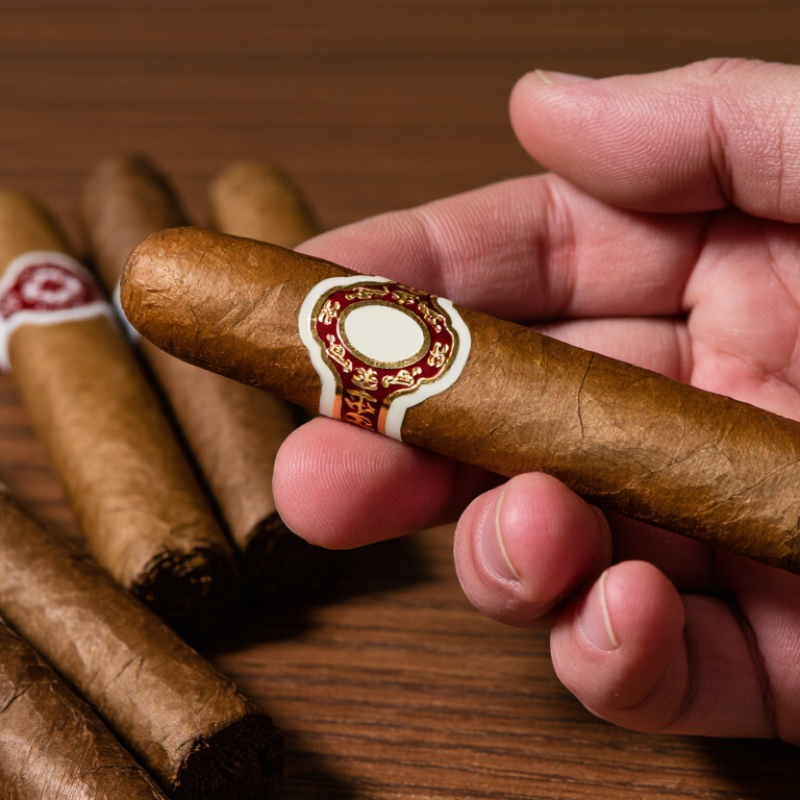
10 Tips for Choosing Custom Cigar Labels

Define the Label’s Purpose, Audience, and Brand Identity

A custom cigar label should do more than look attractive. Decide what it needs to communicate before choosing colors or finishes. Is its main job to identify a blend, signal a special occasion, or express a maker’s style? Keep the purpose specific. A label trying to say everything can feel crowded. That is easy to overlook.

Picture the intended customer holding the cigar in a shop or examining it at home. A longtime enthusiast may value clear blend details, while a gift buyer may notice the mood and presentation first. Use readable type, strong contrast, and enough space around essential text. A glossy finish can catch light, but it may also make small lettering harder to read. Test a printed sample under warm and cool lighting. Small details matter.

Your visual choices should feel consistent with the identity behind the product. A restrained palette, textured paper, or a simple emblem can suggest craftsmanship without shouting. I might be giving too much weight to appearance; clarity still comes first. Ask a few people in your intended audience what they notice, then compare their answers with your goal. If they remember the decoration but miss the blend name, revise the hierarchy. Keep the useful details visible, and let the design breathe.

Choose Label Materials That Suit Cigar Storage Conditions

Humidity can expose a weak label long before a cigar leaves its box. In many humidors, relative humidity is maintained near 65–70%, while temperature may fluctuate during storage. Paper labels can absorb moisture, curl at the edges, or lose adhesive strength. A glossy finish may resist surface moisture, but it cannot compensate for an unsuitable adhesive. Small details matter: a lifted corner can catch on a divider or rub against a neighboring cigar.

Tips: Match the label stock and adhesive to your actual storage conditions. Ask the printer for moisture-resistant paper or film, and confirm the adhesive stays bonded in humid environments. Test labels on the real packaging—not just a sample sheet.

ASTM International’s D4332-22 packaging-conditioning standard specifies a test atmosphere of 23°C ±1°C and 50% ±2% relative humidity. That is a useful baseline for comparing samples, not a substitute for testing in a humidor’s typically higher humidity. Store a few labeled boxes in the intended environment, then inspect them for bubbling, fading, and edge lift. I would test more than once; one neat sample proves very little. A matte paper may suit a dry display case, while a synthetic film can be a better candidate for prolonged humid storage. Still, film may feel less natural. Check before committing.

10 Tips for Choosing Custom Cigar Labels: Match Materials to Storage Humidity

Common relative-humidity ranges used when storing cigars. Actual preferences vary; stable conditions matter more than any single target.

Humidity can affect paper labels and adhesives over time. For humid storage, consider coated or otherwise moisture-resistant label stock, and test the material and adhesive under your expected conditions before ordering.

Plan the Layout, Typography, Colors, and Required Information

Plan the label at actual print size before refining its details. A cigar band has little room, so give the cigar name, size, and required information a clear reading order. Keep essential text away from seams and curved edges, where letters can disappear from view. Use one display typeface and a simpler face for supporting text. Small decorative lettering may look elegant on screen. In print, it can blur. Keep it legible. For color contrast, the W3C Web Content Accessibility Guidelines set a 4.5:1 minimum for normal text; this is a useful benchmark, though not a packaging regulation.

Choose colors that remain distinct under warm shop lighting, not only on a bright monitor. A 2018 Ipsos survey for the Paper and Packaging Board found that 72% of U.S. consumers said packaging design influences their purchasing decisions. That broad finding is not cigar-specific, but it supports treating the label as part of the product’s first impression. Use a printed proof to check fine lines, foil, and dark lettering against the stock. I still find that one extra flourish can weaken the hierarchy. Leave some space. Before production, have a qualified reviewer check required statements for the intended market; rules and wording can vary.

Compare Printing Methods, Finishes, and Customization Options

Custom cigar labels must balance fine detail with durability. Digital printing suits short runs and quick artwork changes; flexographic printing can become more economical at higher volumes. Ask for a press proof on the intended label stock. Tiny type may look crisp on screen but fill in when printed. Check the smallest lettering, fine borders, and color consistency under warm indoor light.

Finishes change both appearance and handling. Matte coatings reduce glare and give a quiet, tactile surface; gloss makes dark colors look deeper but can reveal fingerprints. Foil stamping adds reflective detail, while embossing creates a raised edge you can feel. Keep these effects restrained: crowded finishes can compete with the artwork.

Smithers’ report The Future of Labels and Release Liners to 2028 projects annual market growth of about 3.8% through 2028. That broad trend supports comparing production options, but it does not prove one method fits every order.

Request written quotes at two quantities, and confirm whether setup costs, coating, and finishing are included. Then test adhesion on the actual wrapper or packaging surface. A small mismatch matters. A label that looks beautiful but lifts at the corners needs another proof.

Review Proofs, Verify Compliance, and Select a Reliable Printer

A cigar label should look refined, but it also needs to stay readable on a curved surface. Review the proof at actual size, not just on a bright monitor. Check the product name, small print, barcode area, and alignment near the seam. Ask for a physical sample if paper texture or foil is part of the design. Screen colors can mislead. A tiny type size may seem elegant in a PDF and become hard to read in hand.

Verify current packaging requirements for the markets where the product will be sold. Required wording, warning placement, and minimum text sizes can affect the layout. Confirm these details with a qualified compliance professional before approving production; a printer can flag technical issues but may not provide legal advice. Also check that the final artwork matches the approved version. One overlooked revision can be costly. It is worth slowing down here.

Tips: Request a written proof approval process, a clear production timeline, and samples of comparable label work. Ask how the printer handles color variation, adhesive performance, and reprints when defects occur. Check references, too. A low quote is not the whole story. I would still compare one more sample before committing; it can feel fussy, but it often reveals details a proof cannot.

10 Tips for Choosing Custom Cigar Labels — Review Proofs, Verify Compliance, and Select a Reliable Printer

No. Tip What to Check Useful Evidence or Action
01 Confirm the label’s purpose and placement Decide whether the label is for a cigar band, box, or another package surface. Measure the intended area and account for curves, seams, and overlap. Provide the printer with the package dimensions and a physical sample or accurate drawing.
02 Review the proof carefully Check spelling, punctuation, artwork, colors, alignment, and the position of every text element before approving production. Compare the proof against the final copy and keep a dated copy of the approved version.
03 Verify applicable labeling requirements Requirements can vary by product, market, and sales destination. Confirm which rules apply to the cigar and package rather than relying on a generic template. Have the responsible compliance reviewer check the final label content before the print run.
04 Choose a suitable label material Consider thickness, flexibility, surface texture, and how the material will perform on the actual cigar band or package. Request material samples and test them on the intended surface before ordering at scale.
05 Check adhesive and application method Confirm that the adhesive suits the package surface and that the label can be applied consistently by hand or with the planned equipment. Apply sample labels to representative packages and check for lifting, shifting, or difficult removal where relevant.
06 Make text clear at final size Review small text, contrast, spacing, and fine details at the label’s actual printed dimensions—not only enlarged on a screen. Ask for a correctly scaled proof and inspect a printed sample under normal viewing conditions.
07 Specify colors and finishes in writing Describe required colors and any finishes, such as foil, embossing, or varnish. Screen colors may not precisely match printed results. Agree on color references and finish details, and request a physical sample when color or finish is critical.
08 Check artwork and file requirements Confirm the accepted file format, image resolution, bleed, safe area, and handling of fonts and linked artwork. Send production-ready artwork using the printer’s current specifications and resolve preflight warnings before approval.
09 Compare quotes on the same specifications Compare quantity, material, dimensions, printing method, finishes, setup charges, shipping, and estimated production time. Request an itemized written quote so that differences between offers are clear.
10 Assess printer reliability and quality control Ask how proofs are approved, how print consistency is checked, how defects are handled, and whether the schedule fits your needs. Review relevant samples, confirm timelines and acceptance criteria in writing, and clarify the process for resolving production issues.